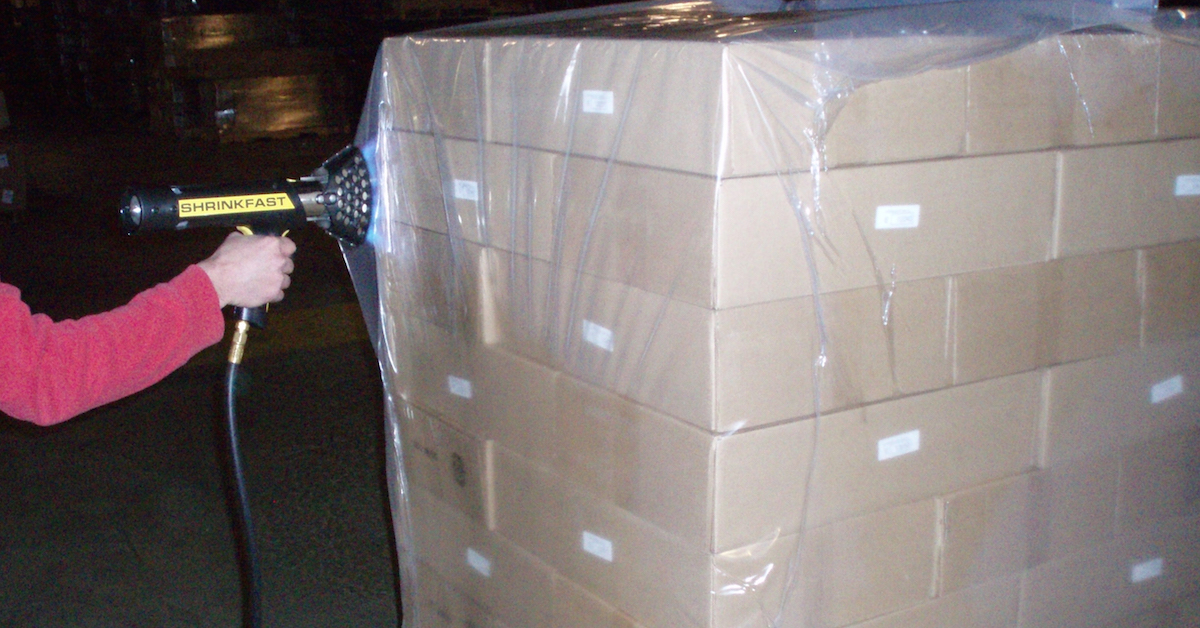
Below is our guide and video demonstration on how to partially or fully heat shrink wrap materials. Follow these steps for your application.
More questions? Chat Now or call our plastic sheeting experts at 760-388-6294.
Partial Wrapping
Step 1. Check for sharp areas that may require padding to keep the shrink wrap from tearing. Also check for delicate areas like the electrical panels, or hoses that might need extra protection. Walk around the object and thoroughly inspect it so you can determine if you are going to do a partial wrap using hard attachment with tape, strapping and nailed wood strips, or if you will be doing a full wrap.
Step 2. Pad the areas determined to be delicate or sharp.
Step 3. Measure your object to decide what size heat shrink wrap film you will need.
Step 4. When partially wrapping, unroll the material taking it over the top to the other side. Avoid dragging the material on the floor to keep it from getting dirty or getting torn.
Step 5. Attach the heat shrink film to the object. The most common method is tape, but you could also use nail-on-wood strips or strapping. Start on one side and continue around the object until done. *Tip: Fold the weird angles and corners as if you are gift wrapping, spray with adhesive or hold with tape so you can heat seam it.
Step 6. Strapping can be used as a base for extra security. To do so, you will need at least 6-8 inches of excess material below the strapping. Tighten the strapping and fold over the strapping. Hold it in place with tape or spray adhesive and then heat seam it. Proceed to step 6 to Shrink wrap the object.
100% Wrapping
Step 1. Check for sharp areas that may require padding to keep the shrink wrap from tearing. Also check for delicate areas like the electrical panels, or hoses that might need extra protection. Walk around the object and thoroughly inspect it so you can determine if you are going to do a partial wrap using hard attachment with tape, strapping, and nailed wood strips, or if you will be doing a full wrap.
Step 2. Pad the areas determined to be delicate or sharp.
Step 3. Measure your object to decide what size shrink wrap film you will need.
Step 4. Unroll the material starting from one side and going over the top of the object to the other side and cut the material so that it fits completely around the object.
Step 5. With the object in the center of the material begin adhering the material together with the object with spray adhesive or tape, remembering to fold the weird angles and corners as if you are gift wrapping. Once the heat shrink film is attached to the object all the way around you can proceed to step 6.
Step 6. Begin heat shrinking the material at the base of the object in a slow back-and-forth movement. Start from the bottom and move your way up, leaving the top as the final phase. Your arm motion should be fluent but do not stay in one place too long as it will burn a hole. Keep moving until the entire object is shrink wrapped.
Step 7. For extra security when you are done heat seaming, tape up holes, thin spots, and seams.
Trusted by Builders, Growers, and Distributors
Americover is the smart source for polyethylene and plastic sheeting. Trusted by contractors and distributors across construction and agriculture industries, our American-made products combine reliability with quality and innovation. We protect and enhance projects from the ground up with reliable solutions, responsiveness, and quick turnarounds.
As an Americover customer, you will receive the personalized support of a dedicated account manager to simplify the ordering process and ensure the best solution for every one of your projects. Our friendly, knowledgeable staff is here to answer your questions and fulfill orders Monday-Friday from 6 a.m. to 6:30 p.m. Pacific Standard Time. If you would like to speak with one of our experts, call us at 760-388-6294 or Chat Now.
